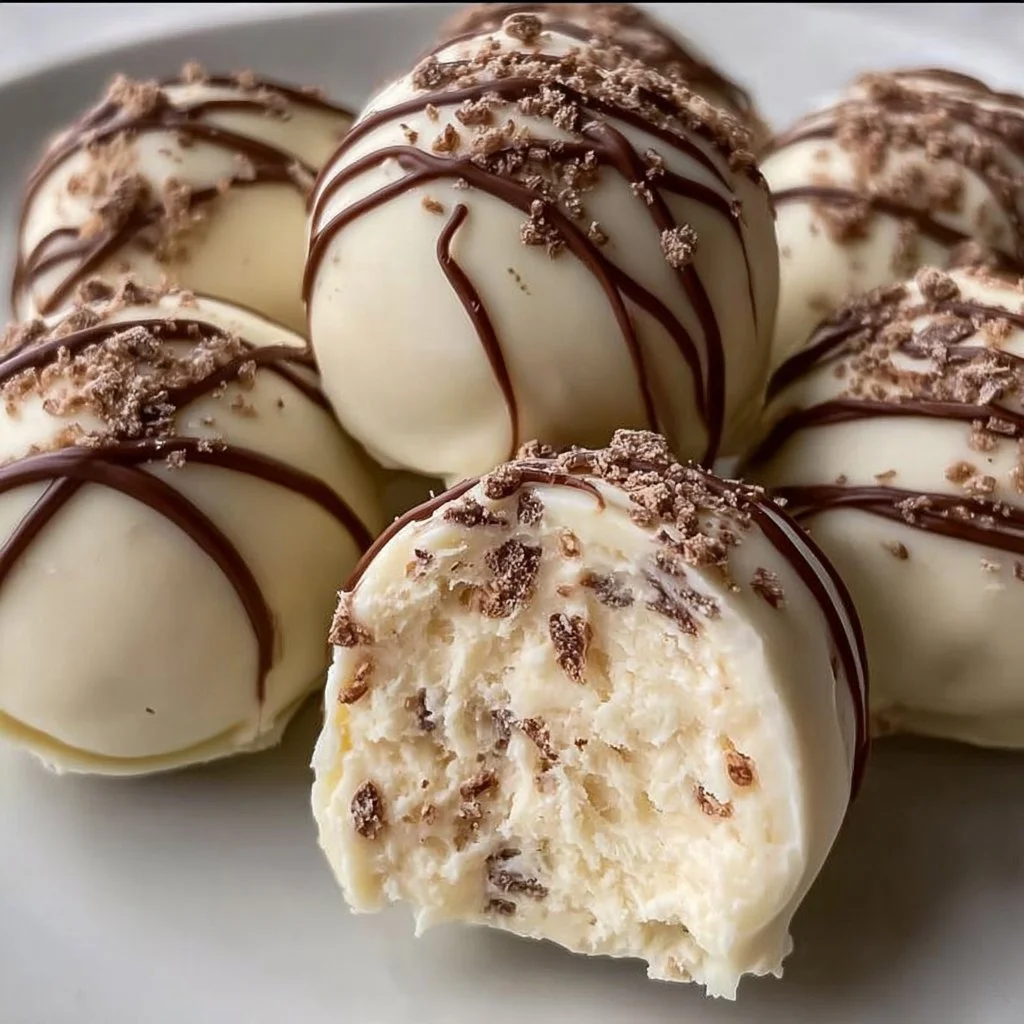
Baileys Cheesecake Balls
Baileys Cheesecake Balls
While we have provided a jump to recipe button, please note that if you scroll straight to the recipe card, you may miss helpful details about ingredients, step-by-step tips, answers to common questions and a lot more informations that can help your recipe turn out even better.
There’s a quiet joy in the kitchen at dusk when the golden light dances through the window, and everything feels a touch softer. It’s a time I often dip into making these delicious Baileys Cheesecake Balls. They’re perfect for those days when you want a little something sweet without all the fuss. Maybe it’s the end of a long week, or perhaps it’s simply a Saturday afternoon, and the idea of something indulgent feels like a gentle whisper of comfort.
What I love most about these treats is how forgiving they are. When I first made them, I had just enough ingredients on hand to get started. Standing there, I crushed the cookies a bit too roughly, leaving some larger chunks. But guess what? It didn’t matter at all. They turned out delightful—some bites were a little crunchier, and that ended up being part of the charm.
So, whether you’re aiming for perfection or just something to enjoy with a cup of coffee, these cheesecake balls bring a sense of warmth to the table, and they’re easy enough to make that you can let the kids help out too. And yes, they’re also a winner at potluck gatherings, often disappearing faster than I can blink.
Gather Your Ingredients
For this straightforward but delightful treat, here’s what you’ll need:
- 2 dozen chocolate-covered butter cookies
- 8 ounces mascarpone cheese
- 1 cup powdered sugar
- 1/4 cup Baileys Irish Cream
- 1 teaspoon vanilla extract
- Chocolate for coating
Let’s Make Magic
Here’s how to turn those simple ingredients into something delightful:
- Crush the chocolate-covered butter cookies into fine crumbs.
- In a mixing bowl, combine the cookie crumbs, mascarpone cheese, powdered sugar, Baileys Irish Cream, and vanilla extract. Mix until well combined.
- Roll the mixture into small balls and place them on a baking sheet.
- Refrigerate for about 30 minutes to set.
- Melt the chocolate and dip each ball into the chocolate to coat.
- Return the chocolate-covered balls to the baking sheet and let them cool until the chocolate hardens.
- Serve and enjoy!
A Little Patience Goes a Long Way
As you roll those little balls, you might notice some of the coating chocolate offers a touch of resistance. Don’t rush it. Let the chocolate cool just a bit; this helps keep it glossy, and trust me, nobody wants a chunky finish after all that effort.
Also, keep in mind that it’s really okay if your balls aren’t completely uniform. That handcrafted look tells a story all its own. Besides, when you share them, everyone will be too focused on how delicious they are to notice a little imperfection.
Make Ahead and Store for Later
If you’re thinking of a gathering or want to treat yourself over a few days, you can make these ahead of time. They hold up quite well in the fridge for several days. Just store them in an airtight container and pull them out whenever you need a sweet nibble, perhaps with a warm cup of tea or coffee.
Did you know? You can also freeze them! Just let them set up first, then layer them between parchment paper. When you need a treat, they can go straight from the freezer to an afternoon pick-me-up.
Substituting Like a Pro
Don’t fret if you’re missing an ingredient or two. If you don’t have mascarpone cheese, cream cheese or ricotta can work in a pinch—though the texture may vary just a smidge. The Baileys can also be swapped for flavored syrups, or a splash of coffee extract if you want to skip alcohol altogether.
Mix and match based on what your pantry is singing to you. After all, cooking is less about strictness and more about freely expressing what feels good at that moment, right?
Dealing with left over Ingredients
Should you have some leftover chocolate sitting around (which, let’s be honest, is a pleasant problem to have), consider melting it down for drizzling over fruit, or even for a fun morning pancake topping. A little creativity can turn those bits into something special.
For the Kids
If you have little helpers, let them shape the balls! It’s a great way for them to engage with what’s happening in the kitchen, and who knows? They might just surprise you with their creative flair. Plus, hands covered in chocolate are usually a good sign of a fun day.
Practical Questions You Might Have
They can last about 3 to 5 days when stored in an airtight container, though I doubt they’ll last long once people dig in!
Absolutely! Any chocolate cookie can work, and you might even try a peanut butter cookie for a unique flavor twist.
You can add a splash more of Baileys or a bit of cream until the mixture is cohesive enough to hold together when rolled.
Make sure the chocolate isn’t too hot when dipping, and consider tempering it if you want a bit more luster. But a light drizzle can still be lovely!
Yes, just swap the chocolate-covered cookies for gluten-free cookies, and you’re all set!
Passing Along Comfort
As I gather my family around the table, sharing these Baileys Cheesecake Balls feels generous, like passing around a recipe card from old friends. It’s about savoring each bite while knowing that simple, sweet moments are what linger long after the dishes are done. Here’s to the chaos and joy of daily life, wrapped up in little bites we make together. So, roll up your sleeves, and enjoy this recipe—it’s here for the moments we share.
Baileys Cheesecake Balls
Ingredients
Main Ingredients
- 2 dozen chocolate-covered butter cookies
- 8 ounces mascarpone cheese
- 1 cup powdered sugar
- 1/4 cup Baileys Irish Cream
- 1 teaspoon vanilla extract
- to coat amount Chocolate for coating the balls
Instructions
Preparation
- Crush the chocolate-covered butter cookies into fine crumbs.
- In a mixing bowl, combine the cookie crumbs, mascarpone cheese, powdered sugar, Baileys Irish Cream, and vanilla extract. Mix until well combined.
- Roll the mixture into small balls and place them on a baking sheet.
- Refrigerate for about 30 minutes to set.
- Melt the chocolate and dip each ball into the chocolate to coat.
- Return the chocolate-covered balls to the baking sheet and let them cool until the chocolate hardens.
- Serve and enjoy!
Notes

From My Kitchen to Your Inbox
Simple, reliable recipes, thoughtful cooking tips, and a little Sunday-supper inspiration, delivered straight to you. No noise, just good food and the stories that make it meaningful.
Comments closed