
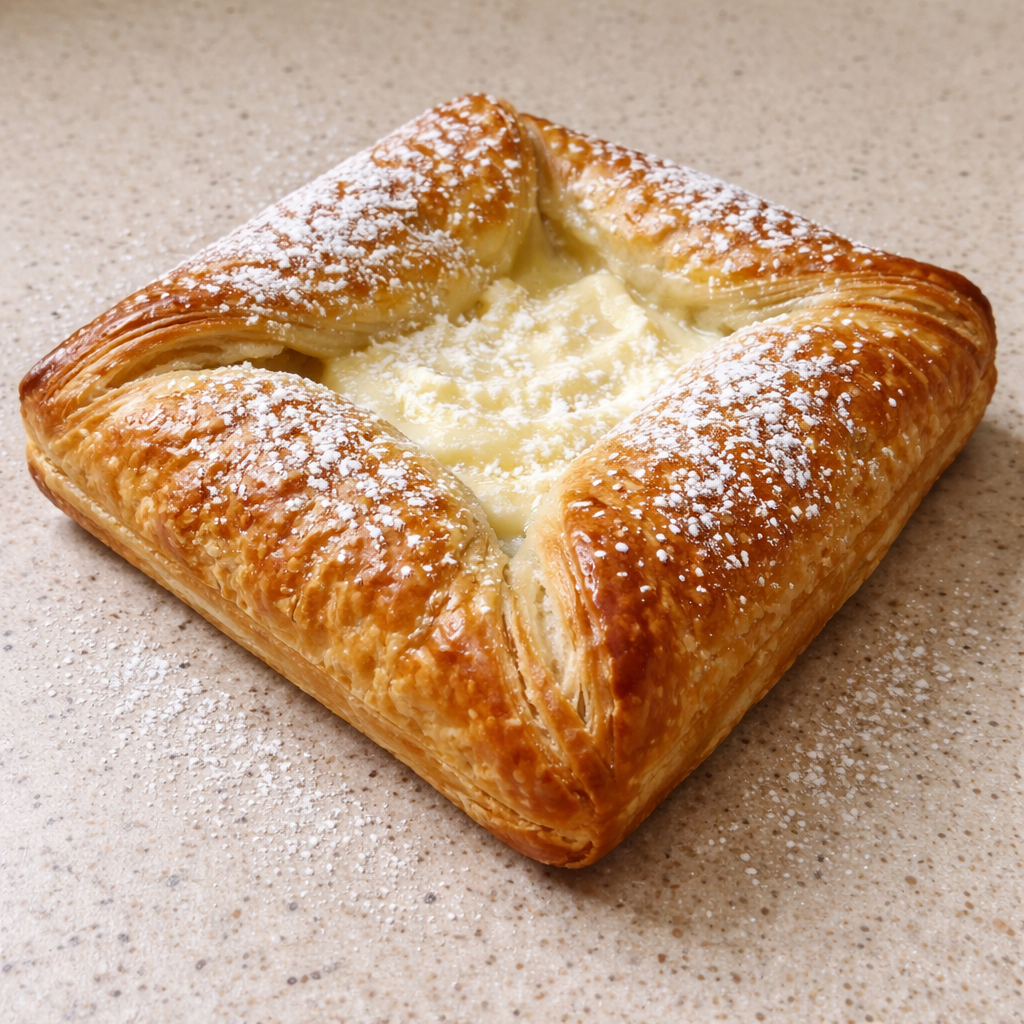
Easy Puff Pastry Cheese Danish Recipe for a Quick Breakfast Treat
Easy Puff Pastry Cheese Danish Recipe for a Quick Breakfast Treat
While we have provided a jump to recipe button, please note that if you scroll straight to the recipe card, you may miss helpful details about ingredients, step-by-step tips, answers to common questions and a lot more informations that can help your recipe turn out even better.
The first time I made these little cheese danishes, it was a Tuesday night that felt like a Friday in disguise. There were school forms spread across the table, one sock missing (somehow always just one), and I realized I had promised to bring “a small breakfast treat” to a 7:30 a.m. meeting the next morning. Of course.
What I did have was a forgotten box of puff pastry in the freezer and half a block of cream cheese with a corner nibbled off, thanks to a curious child who thought it was “vanilla fudge.” I remember staring at the clock, then at the pastry, then at the dishes stacked in the sink. The idea of fussy laminated dough and fancy braiding was out of the question.
So I did what most of us do in these moments. I simplified, said a little please-work prayer to the oven, and came up with this Easy Puff Pastry Cheese Danish.
They are not bakery-perfect. They are better than that. They are the kind of thing you can put together while the coffee brews, carry on a paper plate into a meeting, or wrap in foil and tuck into a lunchbox. They taste like you tried, even if the rest of the day is hanging together with rubber bands and goodwill.
Why this puff pastry cheese danish deserves a spot in your rotation
This recipe leans on store-bought puff pastry and the simplest possible cheese filling. No long ingredient list, no special equipment. If you can stir and fold, you are set.
A few reasons it works, even on the kind of morning when the cat spills the cereal bowl:
- The ingredients are familiar and inexpensive, nothing wild or hard to find.
- The pastry is flexible, you can cut it larger for brunch plates or smaller for coffee-hour bites.
- The filling is forgiving. If your cream cheese is not perfectly soft, you can still make it work.
- They reheat nicely and taste good at room temperature, which helps when you are feeding people at different times.
This is one of those recipes you can memorize, then adjust as life requires, sweeter or less sweet, plain or dressed up with a spoonful of jam.
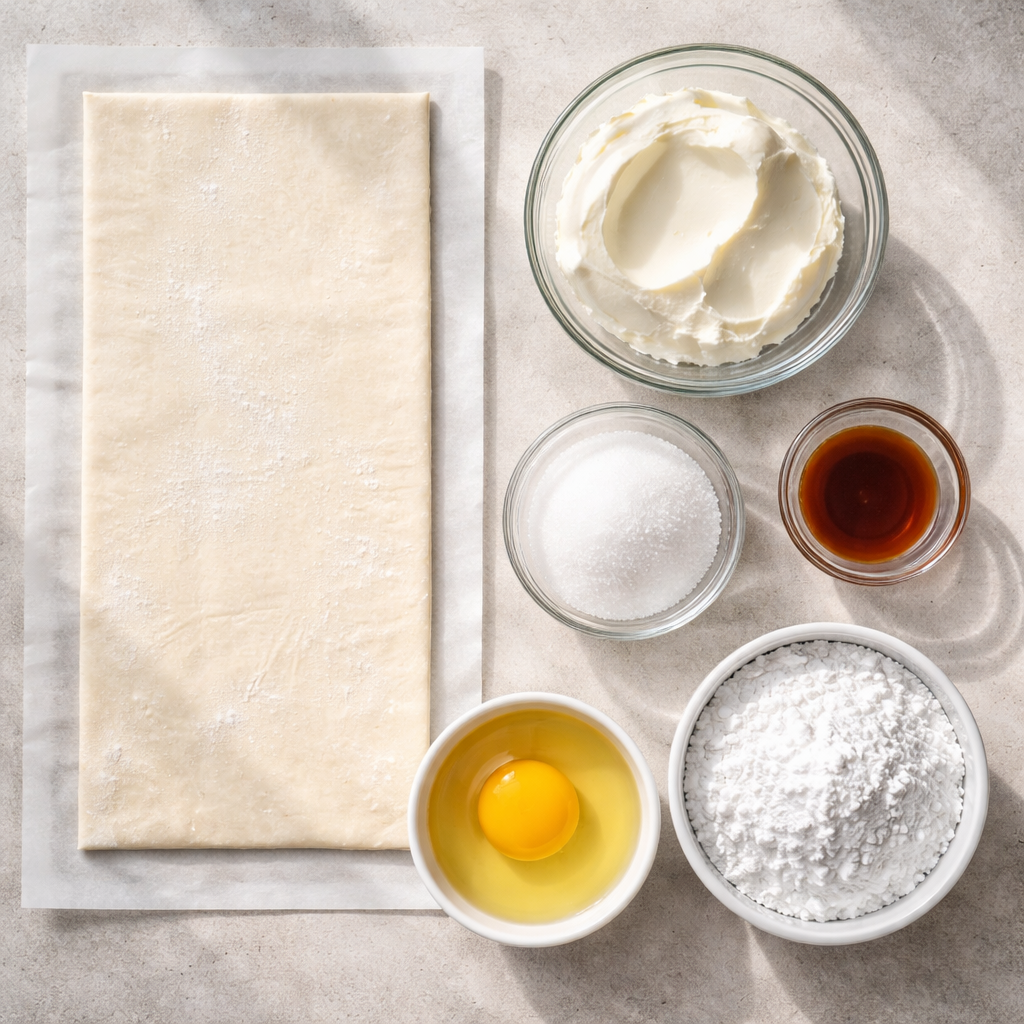
What you will need for the cheese danish
- 1 sheet puff pastry
- 8 oz cream cheese, softened
- 1/4 cup sugar
- 1 tsp vanilla extract
- 1 egg (for egg wash)
- Powdered sugar (for dusting, optional)
Simple steps for easy cheese danish
- Preheat the oven to 400°F (200°C).
- Roll out the puff pastry sheet on a lightly floured surface.
- Cut it into squares or rectangles.
- In a bowl, mix the softened cream cheese, sugar, and vanilla extract until smooth.
- Place a spoonful of the cream cheese mixture in the center of each pastry square.
- Fold the corners of the pastry over the filling to create a pocket.
- Brush the tops with beaten egg for a golden finish.
- Bake in the preheated oven for 15-20 minutes or until golden brown.
- Allow to cool slightly and dust with powdered sugar before serving.
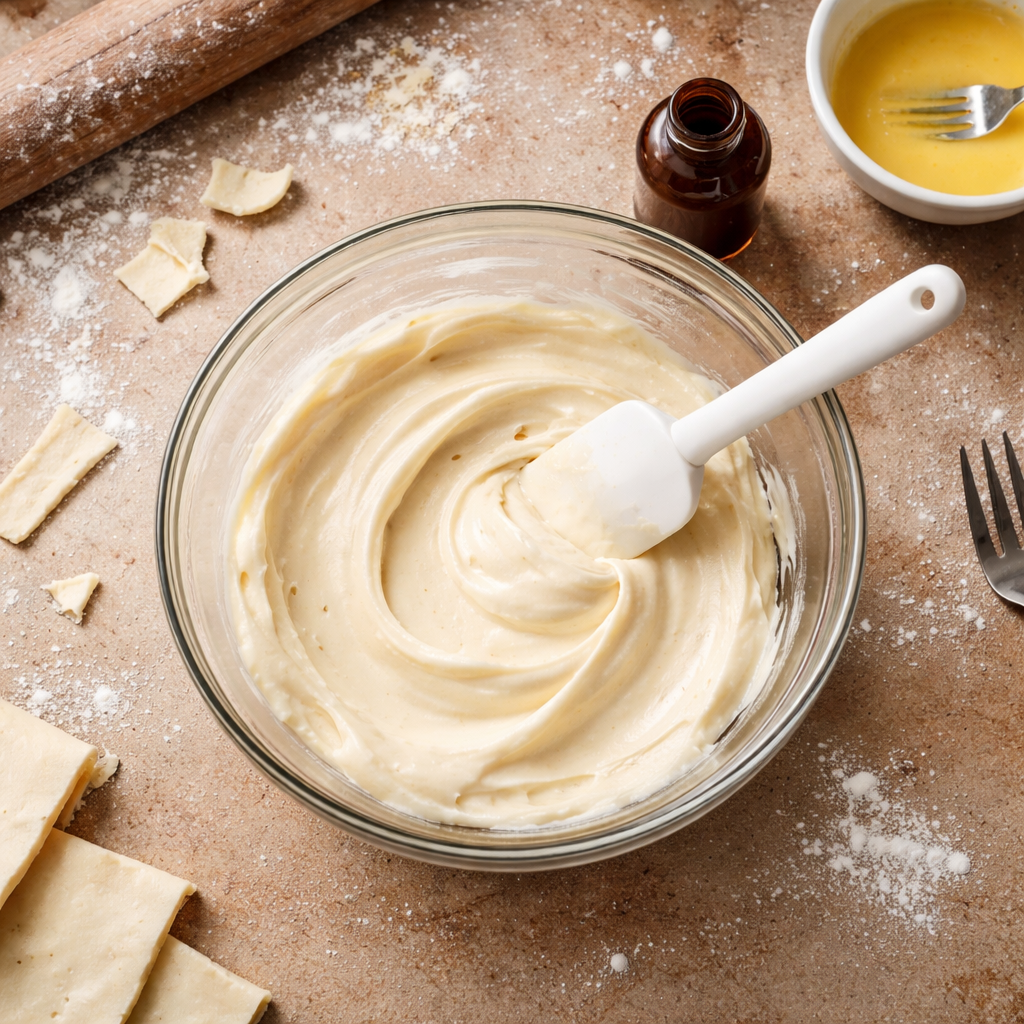
How it should look and smell along the way
You do not have to guess your way through this.
When you roll out the puff pastry, you are just gently thinning it, not pressing it into a pancake. You should still see the layers, and the dough should feel cool and pliable, not sticky. If it starts to feel soft and floppy, slip it onto a sheet pan and chill it for a few minutes. Puff pastry likes a little breathing room in the fridge.
The cream cheese mixture should look smooth and spreadable, like a thick frosting. If you see a few tiny lumps because the cheese was stubborn, that is all right. They tend to melt into the filling as it bakes. If the mixture seems too stiff to spoon, you can add a teaspoon of milk to loosen it.
In the oven, the pastries will puff and the corners will lift. About halfway through, your kitchen should start to smell like warm butter and vanilla, that gentle bakery smell that makes people wander in asking, “What is in the oven?” The edges should be a deep golden color and the bottoms lightly browned, not pale. If they are coloring too fast, move the pan to a higher rack.
Let them sit for a few minutes after baking. The filling will be very hot, and the rest time lets the cheese settle so it does not ooze everywhere when you pick one up. A short pause does good things in the kitchen.
Make-ahead and morning shortcuts
These are wonderfully friendly to tired mornings and busy schedules.
You can prep the components the night before:
- Stir together the cream cheese, sugar, and vanilla. Cover and refrigerate.
- Move the puff pastry from freezer to fridge to thaw overnight.
In the morning, you are mostly assembling and baking. If you want to go a step further, you can even shape the pastries ahead:
- Cut and fold the puff pastry with the filling.
- Arrange them on a parchment-lined baking sheet.
- Cover lightly with plastic wrap and refrigerate up to 12 hours.
- In the morning, brush with egg and bake.
Leftover danishes keep nicely in an airtight container in the fridge for 2 to 3 days. Reheat them in a low oven, around 325°F, for 8 to 10 minutes until warmed through and crisp again. The microwave will warm them, but softens the pastry. Use it only if you are in true get-out-the-door mode.
I have tucked cold leftovers into a lunchbox more than once. By midday they are just fine at room temperature, especially if you skip the powdered sugar or dust it lightly.
Little variations and pantry swaps
Once you trust the base recipe, you can start to play a bit, depending on what the pantry offers.
- Sweetness: The 1/4 cup sugar keeps the filling gently sweet. If you like more dessert-level sweetness, you can edge up to 1/3 cup. If you prefer things less sweet, 2 tablespoons works too, especially if you add jam.
- Flavor: Vanilla is classic, but a small pinch of lemon zest or a drop of almond extract (go light, it is strong) changes the personality in a nice way.
- Fruit: You can nestle a small spoonful of jam or a thin slice of fruit, like strawberry or peach, under or on top of the cheese filling before folding. Just do not add too much, or it will leak as it bakes.
- Glaze instead of dusting: If you do not keep powdered sugar on hand, you can skip it altogether, or stir a little milk and sugar together for a light drizzle.
- Egg wash alternative: If you are out of eggs, brush the tops with a bit of milk. They will not be as shiny, but they will still brown.
This recipe does not mind if things are not exact. It will meet you where your pantry is.
Shaping the pastries without fuss
There are many beautiful ways to shape a danish. This is the simple way that does not require a ruler or extra patience.
Cutting the sheet into squares, about 3 to 4 inches each, gives a nice single-serving size. If you prefer smaller bites for a big group, make them closer to 2 inches and reduce the filling amount. Just watch the bake time, smaller pieces may be done a few minutes early.
When you fold the corners over the filling, they do not need to meet perfectly in the middle. Sometimes one corner will slide a little, sometimes you get more of an open center with a little cheese peeking through. That is fine. If you want them more secure, you can press the corners together gently or give them a tiny twist.
Leave a bit of space between pastries on the sheet pan, they grow as they puff. Crowded pastries end up steaming each other and do not crisp as nicely around the edges.
If one opens up in the oven and the filling spreads a bit, do not worry. It still tastes wonderful. Imperfect pastry is still pastry.
Serving these in real life
These are at home on a weekend breakfast table, but they also fit into real weekday life.
For a brunch spread, I like to stack them on a big plate, then sift powdered sugar over the whole pile at once. It feels a bit fancy without effort. Add a bowl of berries and a pot of coffee and you are done.
For school gatherings or work meetings, I let them cool fully, then arrange them in a shallow container in a single layer. If you need to stack them, place a sheet of parchment between layers so the tops do not stick.
At home, I usually set a few aside before they hit the table. Someone will wander back through the kitchen at 11 a.m. looking for “just a bite of something,” and a leftover cheese danish with a cup of reheated coffee feels like a quiet little win.
Cheese Danish FAQs from one home kitchen to another
No. As long as the ingredients are mixed, a few small lumps are fine. They usually smooth out as the filling heats and sets in the oven.
You need to thaw the puff pastry enough to unfold and cut it. A quick thaw on the counter, about 30 to 40 minutes, usually does the trick if you forgot to move it to the fridge.
Use a preheated oven and a light hand with the filling. Baking on parchment helps, and if your oven runs cool, extending the bake by a few minutes until the bottoms are nicely browned will keep them crisp.
Yes. Use two sheets of puff pastry and double the filling ingredients. Bake on two pans, switching their positions halfway through so they brown evenly. It is an easy way to feed a brunch table without doubling your work.
You can gently dab the beaten egg on with a clean paper towel or even your fingertips. You just need a thin coat, not perfection.
You can. Let them cool completely, then freeze in a single layer before transferring to a container. Reheat in a 325°F oven until warmed through and crisp. The texture is best fresh, but the frozen ones are still very welcome on a busy day.
Passing the recipe along
If I were scribbling this on a recipe card for you, I would probably underline puff pastry, cream cheese, 400°F, 15 to 20 minutes, and then write in the corner, “Works even when you are tired.”
Because that is the truth of this little cheese danish. It is not about impressive layers or bakery-style shine. It is about having something warm and creamy you can pull from the oven with a minimum of fuss, to share with whoever is at the table that day.
Keep a box of puff pastry in your freezer and this recipe nearby. On the mornings when everything feels a little off, it is nice to have one small thing you know will turn out all right.

Easy Puff Pastry Cheese Danish
Ingredients
Main ingredients
- 1 sheet puff pastry thawed
- 8 oz cream cheese softened
- 1/4 cup sugar adjust sweetness to taste
- 1 tsp vanilla extract can substitute with almond extract
- 1 egg for egg wash optional
Instructions
Preparation
- Preheat the oven to 400°F (200°C).
- Roll out the puff pastry sheet on a lightly floured surface.
- Cut it into squares or rectangles.
- In a bowl, mix the softened cream cheese, sugar, and vanilla extract until smooth.
- Place a spoonful of the cream cheese mixture in the center of each pastry square.
- Fold the corners of the pastry over the filling to create a pocket.
- Brush the tops with beaten egg for a golden finish.
Baking
- Bake in the preheated oven for 15-20 minutes or until golden brown.
- Allow to cool slightly and dust with powdered sugar before serving.
Notes



From My Kitchen to Your Inbox
Simple, reliable recipes, thoughtful cooking tips, and a little Sunday-supper inspiration, delivered straight to you. No noise, just good food and the stories that make it meaningful.
Comments closed